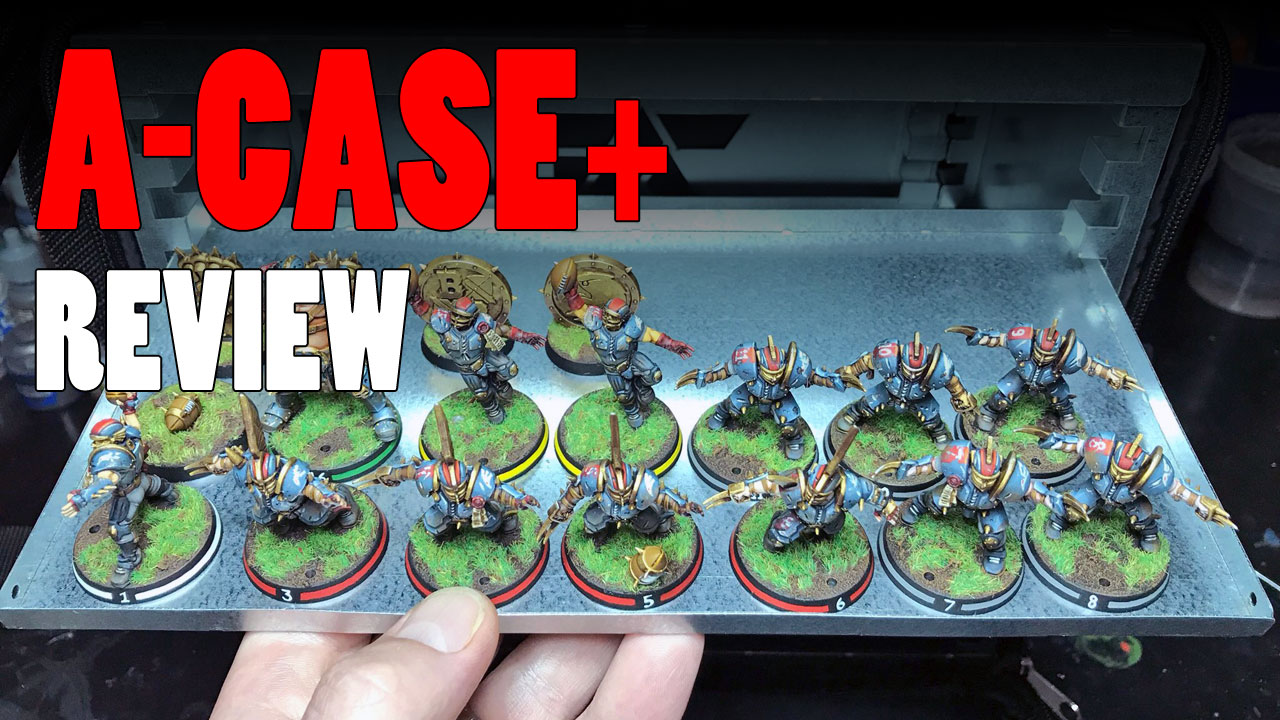
Olo reached out to me about doing a review of the A-Case+ that his company offers. I of course said yes! I have covered the A-Case briefly in my article on magnetic miniature cases, and really liked what I saw from them. So, getting one sent to me for a review was a no-brainer 🙂
Before we get too serious, here’s Cinnamon checking out the box the case arrived in.
Building the A-Case+
I’m going to claim ignorance on this – I had no idea I had to put the case together! In hindsight, in viewing the case on the site, sure enough there’s a video showing how to assemble the case. I totally skipped over that figuring it was a promotional video.
So, my bad on not realizing exactly what I was getting. It’s not the fault of A-Case; they weren’t being misleading.
The Parts
So, I opened the package to see all the steel sheets, cotter pins, and magnets, as well as an instructional pamphlet.
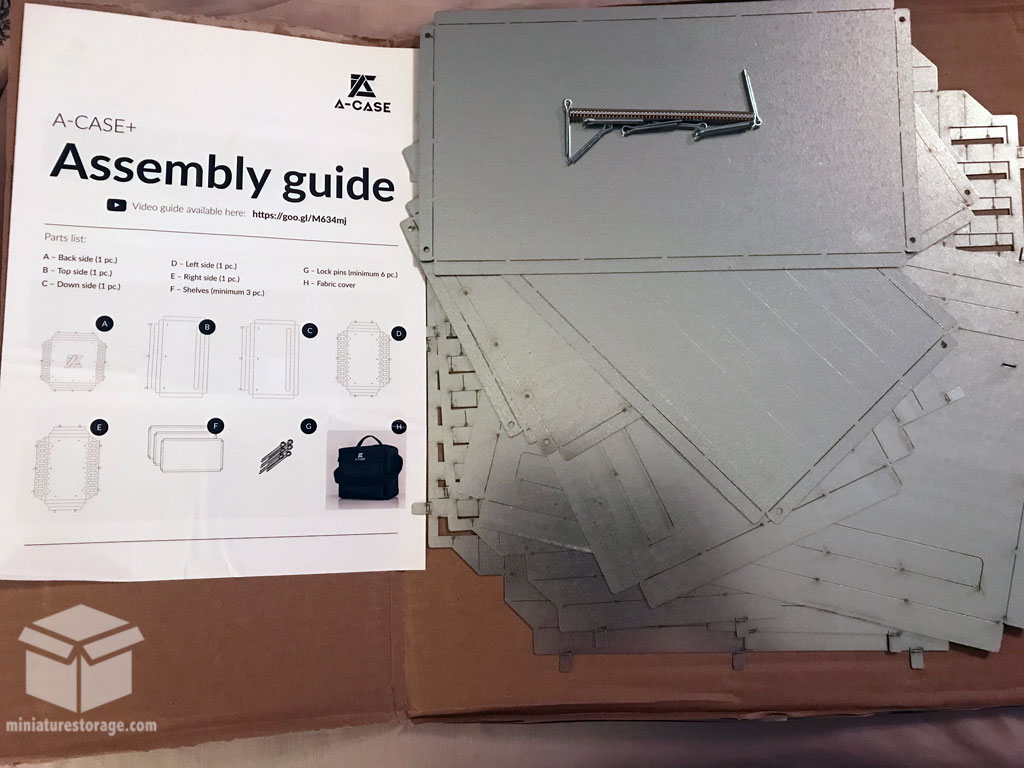
I read through the instructions, and while they’re clearly written with pictures, it’s still a bit confusing. The instructions aren’t poorly written or anything, it’s just that the process of assembly is a little tricky to understand at first.
I went to the site and watched the instructional video, which is really well done, and makes the process so much more clear.
As you can see, it’s not a complicated process, it’s just easier seeing it done than reading it for me.
Once I had all the parts assembled, I had to put the case itself together.
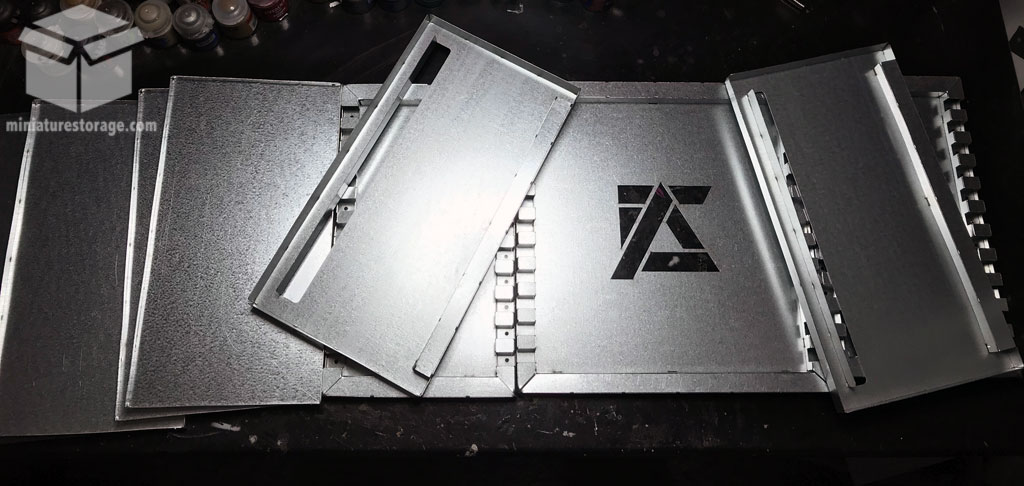
This was straightforward to do.
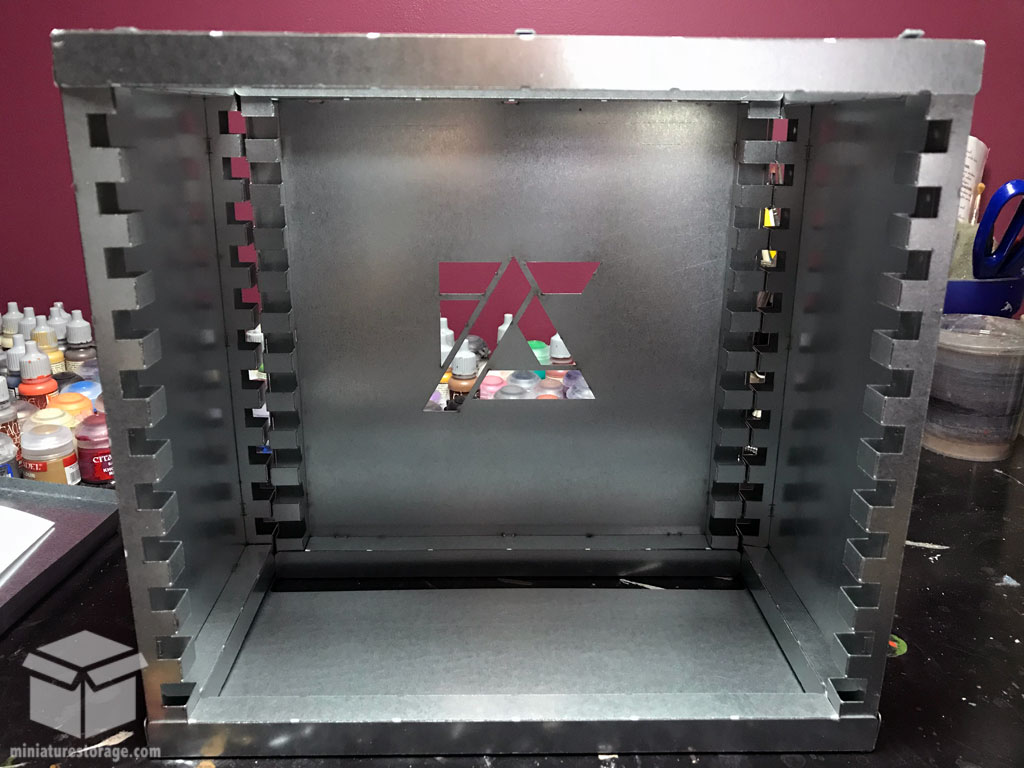
Now, I will note that the top and bottom of the frame is only on there by friction. The bag the case goes into is what holds everything firmly together. Until it’s in the bag though, you have to be a bit careful so the top or bottom doesn’t fall off, as it did to me when trying to lay it into the bag.
Getting it into the bag is a bit of a job too. It’s covered in the above video, but you don’t get a sense of how damn snug that fit is until you’re trying it yourself.
I get it, the bag holds the frame together, so it has to be a tight fit, but there were times I wasn’t sure I could get the frame in there properly, or without ripping the interior of the bag from the steel frame.
Ultimately though, I got it in there, it fit snugly, and I didn’t tear anything in the process. Phew!
Magnetizing My Models
Immediately I knew that I wanted to use the A-Case+ for my Shadespire warbands. I currently have a few of the Feldherr Shadespire trays, which are great, but as I keep collecting warbands (there is no end!), I realized it was going to be cheaper in the long run to get a larger storage solution figured out.
I was planning on buying some pluck foam trays since I knew I could get all my warbands in there, but I’m glad Olo reached out to me before making that purchase.
The size of the A-Case+ seemed perfect for what I needed, so now I just had to magnetize my models for it.
The Magnets
The A-Case+ came with 50 magnets, which is awesome. The thickness of the magnets is perfect for your standard 28mm bases, like all of those that Games Workshop does.
The magnets are 6mm x 2mm, in case you need to order some more. Now, you can buy some more from the A-Case site, and at a very reasonable price if I say so. However, A-Case is based in Poland, so shipping rates may not be ideal for everyone.
For those in the U.S., you can buy 1/4″ x 1/16″ magnets from K&J magnetics. They’re not as cheap as buying from A-Case, but you will save a ton on shipping. K&J is where I buy all my magnets; they’re awesome.
Adding Magnets to My Models
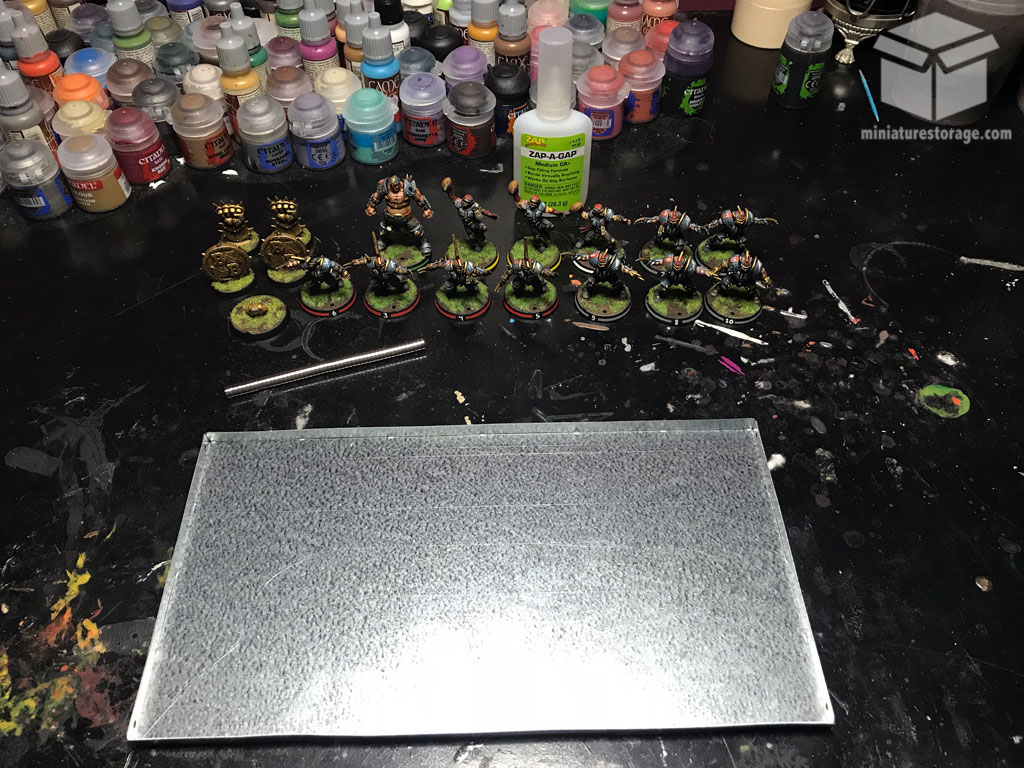
I know I keep talking about Shadespire, but I started by magnetizing my Blood Bowl team. We’re currently playing a season for it, so I wanted to get them ready first.
The process is very simple. I flipped the model over to check out the base. Now, if there’s a clear spot underneath then you can just super glue the magnet on there.
However, in my case, there’s some writing under there. So, I took an old sculpting tool and scrapped the writing off so the surface was flat.
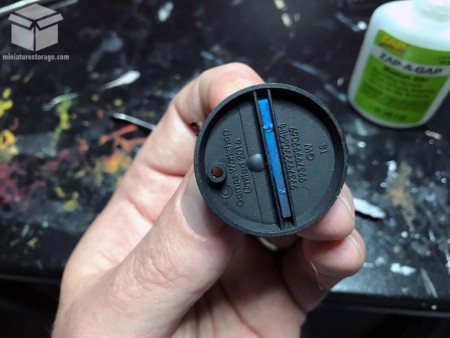
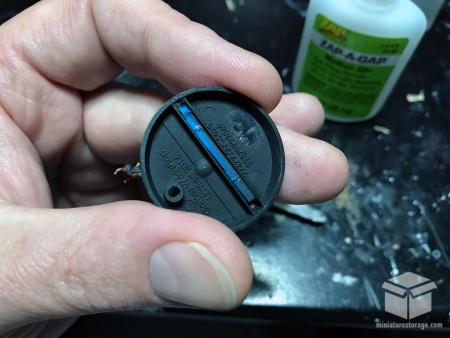
It’s easy enough to do, adds a little time to the process of magnetizing, but it needed to be done. If the surface isn’t flat then the magnet won’t adhere as well as it could. Then, over time, the glue will wear down and the magnet will pop off. I’ve learned this lesson the hard way.
Once I smooth out the area, I just put a drop of superglue on there and place the magnet in it.
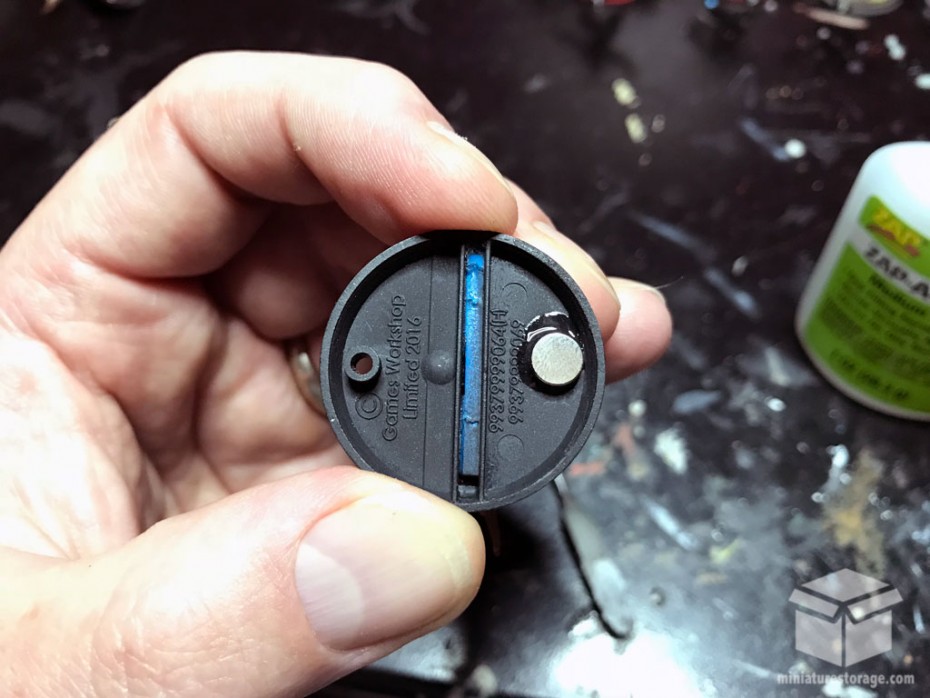
That’s it!
Do that a few times and the team is ready.
The following day I magnetized my Shadespire warbands and got them loaded in.
Let’s Chat A-Case+
Now, the more review-like elements of this article.
The Efficiency of the Case
I had, as mentioned, previously looked at magnetic cases, but their cost, and my skepticism, kept me from buying one. Olo’s timing couldn’t have been better.
I wasn’t skeptical that magnetic cases worked, just skeptical that it would suit my needs. Also, I didn’t feel the cases were overly expensive, just my lack of funds lately has been problematic on that front.
Anyway, the thing I like about the A-Case+ is the size. It seems small, measuring only 10 x 11 x 6 inches, but the beauty of the magnetic system is that it’s more space efficient.
Each of the trays that slide into the A-Case+ are smaller than the foam trays I use in my carrying bags. However, I’m able to get more on that magnetic tray than I do a foam tray measuring 7.5 x 13 inches. My Blood Bowl team took up an entire foam tray.
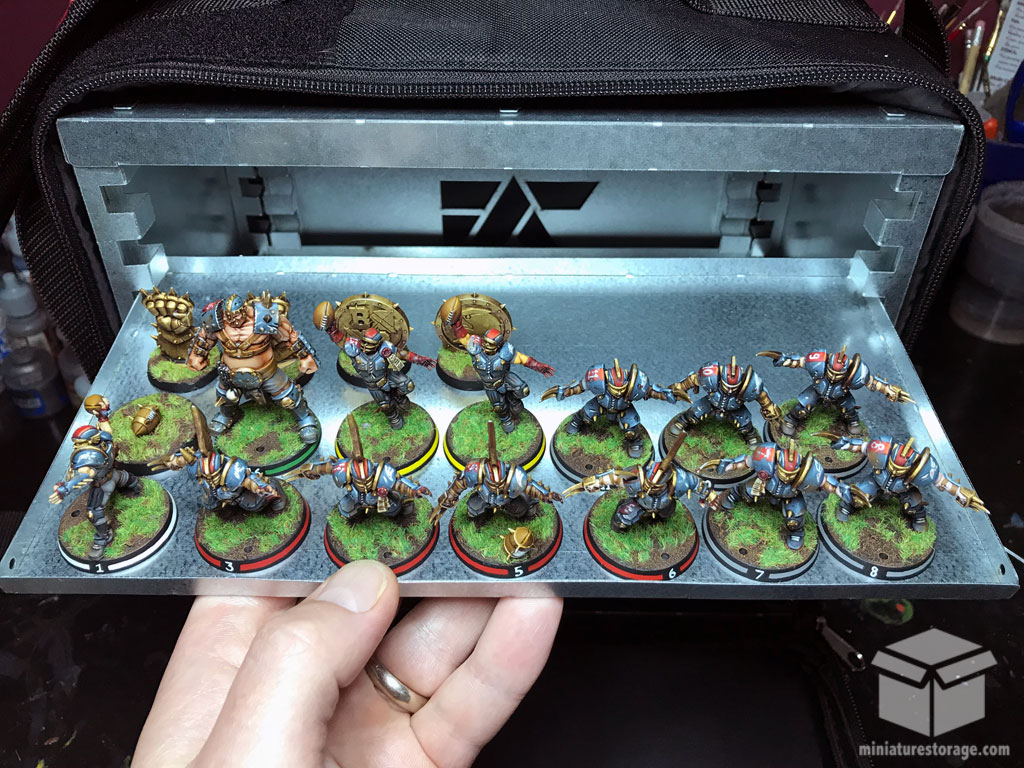
Actually, here’s a shot of the foam tray I was using and the magnetic tray they’re on now. The foam tray is one I made that fits into my Sabol ArmyTransport, so it’s 7.5 x 13 inches.
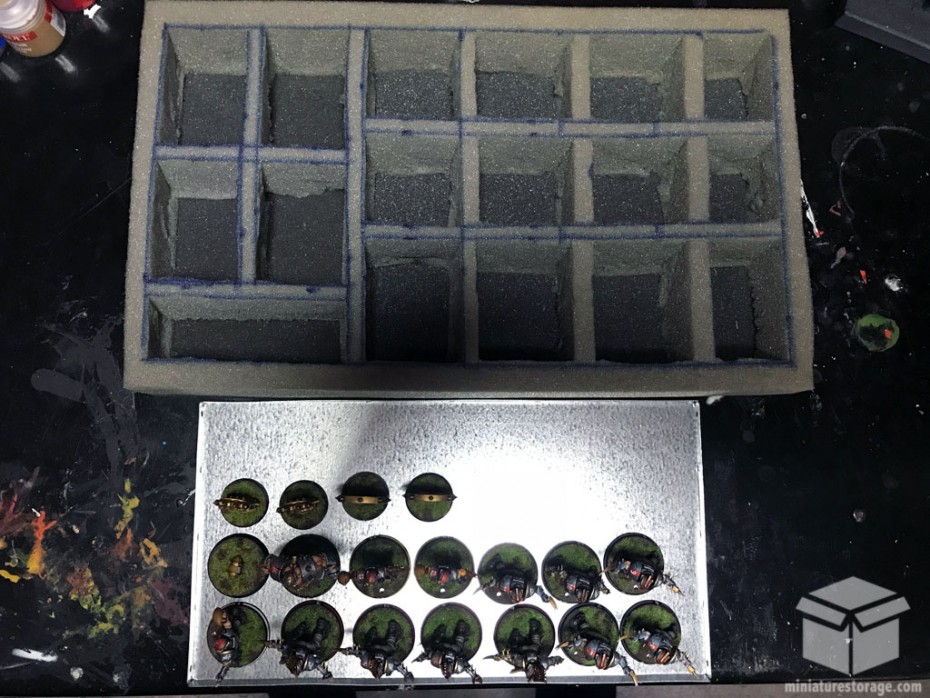
As you can see, the magnetic tray is smaller, but I still have room on there for another 11-12 models. The foam tray, I had two extra slots open I could have used. I’m gaining storage and saving space at the same time.
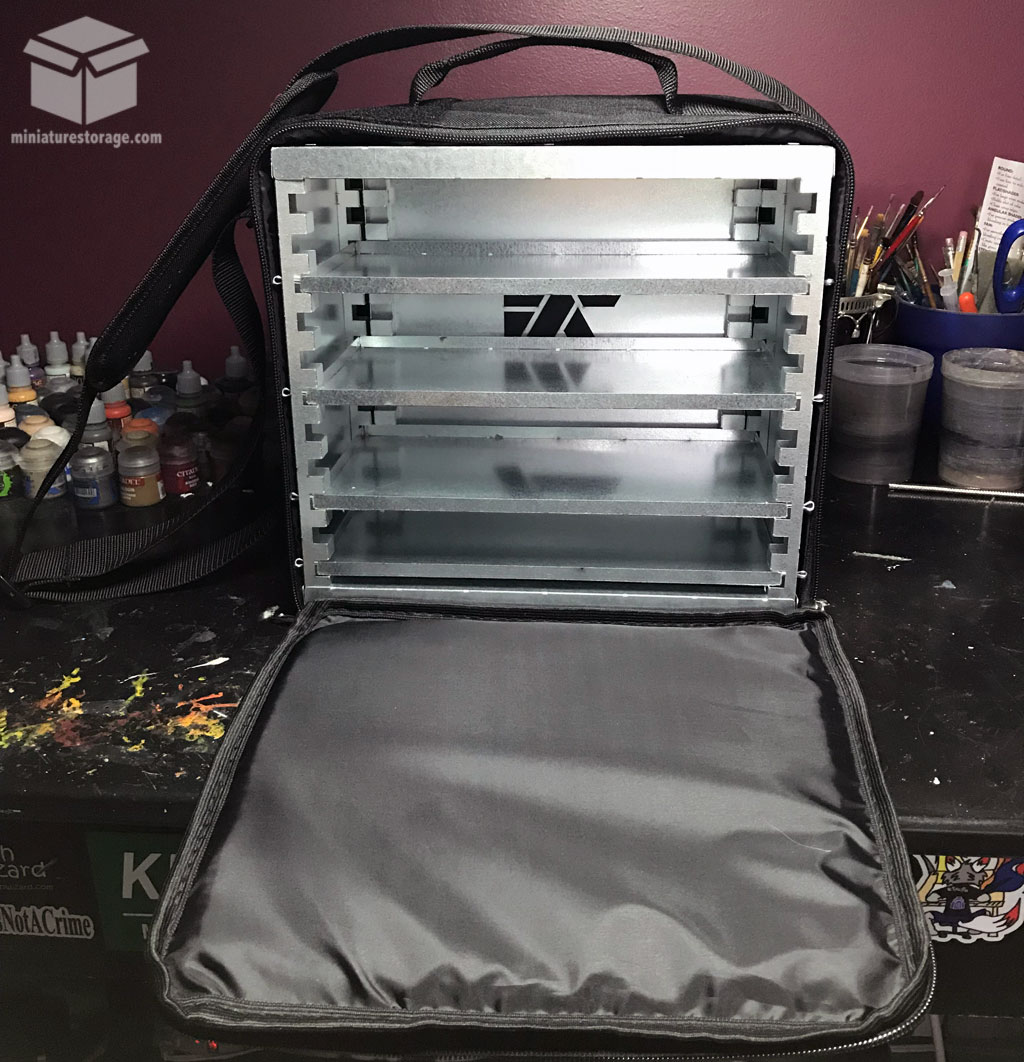
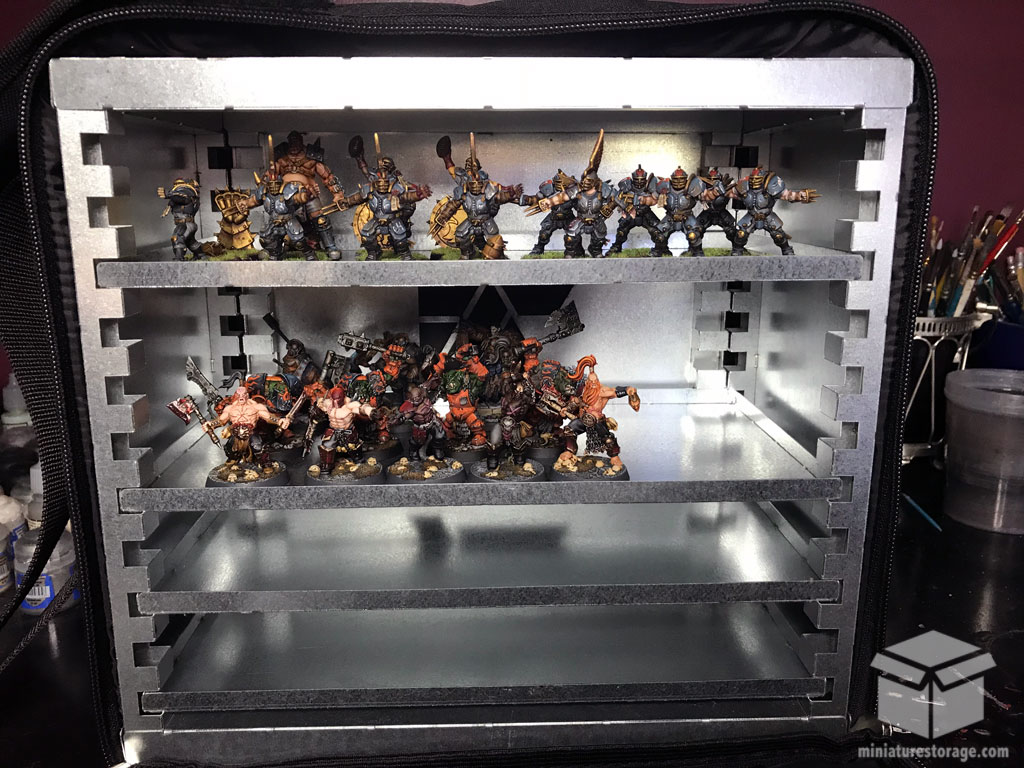
If doing just pure infantry sized models, at a 28mm scale, you can fit 28 models per-tray in the A-Case+. There’s 4 trays in there, so that’s 112 models. That’s damn impressive for how small the case is.
The trays all slide in and out of the case pretty easily. There’s no gliders or guides for the trays, so you have to make sure it’s sliding into the right spot.
There’s also some cotter pins that you can use to lock the trays into place if you’re worried about them sliding. I had them in there at first and then felt I really didn’t need them. With the bag zipped up, everything is in there snug and tight. The trays aren’t going anywhere.
The only concern would be with the bag unzipped, if someone knocks it forward. However, it’s only unzipped long enough to slide out the trays I need, then it gets zipped back up.
A-Case+ Details
It’s worth noting some of the small details about the A-Case+.
The shoulder strap on the case is adjustable, and it has a good range of length. You can tighten it up so it’s right under your armpit, or lengthen it out so it’s down by your waist.
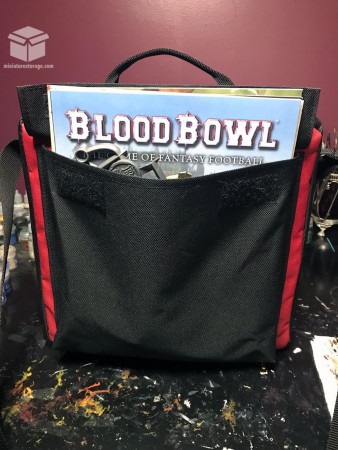
There is a good-sized pocket on the front where you can stash your books, boards, dice, etc. The pocket, surprisingly, is pretty much the same size as the one on my ArmyTransport bag, and the A-Case+ is about half the size of the ArmyTransport.
There’s a neat feature on the bag – velcro. Yep, there’s velcro areas on the bag, so you can stick on things like patches and stuff on there. It’s a minor detail but a very cool feature I have not seen previously.
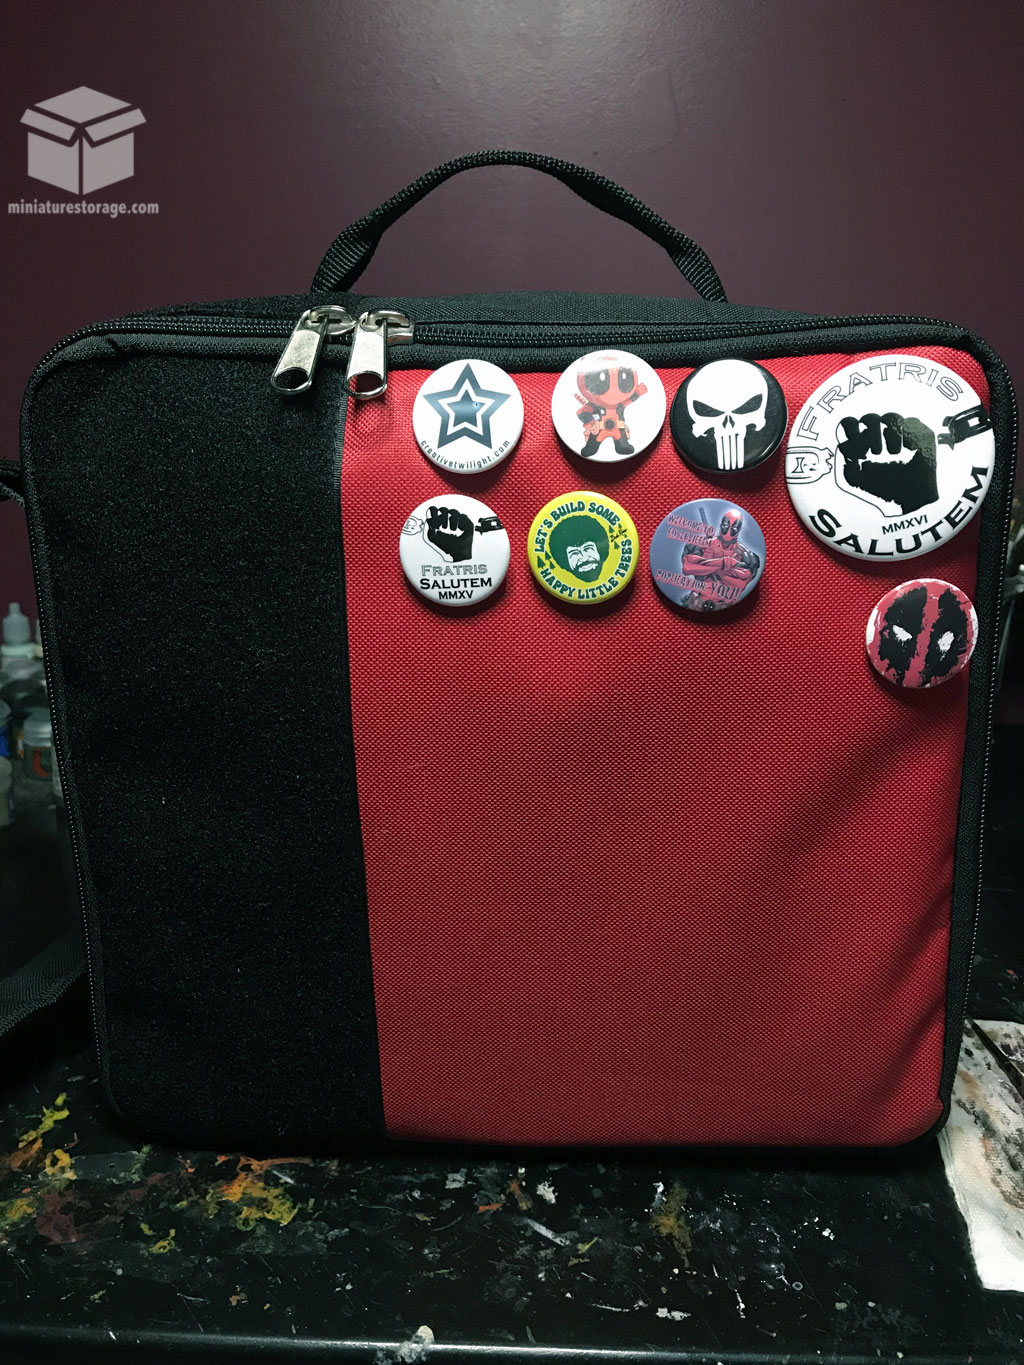
I don’t have any velcro patches, but I do have some buttons I stuck on the case instead 😉 The velcro area is to the screen left of the buttons, and also in the same area on the top near the handle.
Lastly, the material of the bag is of a great quality, as well as the assembly of the bag itself. The material is a high-quality polyester, pretty standard for gaming bags. That means it can hold up to the abuse we all tend to give our bags.
Also, being that the material is woven, it means you can stick buttons on there pretty easily without ruining the bag 🙂
Conclusion
I’m very happy with my A-Case+. I wanted this case to use with the smaller games I’m playing since my Warhammer 40K stuff is all setup with foam at this point, but I had not really committed to anything yet on the other games.
And, as I said, I have no idea how much more I’m going to buy for those games, and having a setup that handles what I currently have, and has room to grow, was exactly what I needed. It’s actually a really economical purchase.
Also, with the smaller games I’m playing lately, I’m also putting in more effort with my painting. Now, while I do like foam trays, you are taking the models in and out of trays constantly to play. That handling, the potential to snap parts off that get stuck on the foam, and the foam itself given enough time will wear things down.
Yet, with the magnetic setup I don’t have to worry about the wear so much. So, those models I’m putting extra work into are safer.
I would definitely recommend getting yourself an A-Case+ if you’re in the market for some magnetic storage for your miniatures. The price is very reasonable as-is, more so when you consider how much more you can fit into it. Plus, it comes with 50 magnets.
There is that little bit of setup involved in putting together your case, but it was easy enough to do. Anyone reading this review likely has put together enough miniatures that they can handle it with no problem.
- Marvel: Crisis Protocol Foam Inserts, Trays & Storage Ideas - December 19, 2019
- The Best Battle Foam Case – What’s Right for You? - July 31, 2019
- Infinity Game Storage Cases You’re Going to Love! - July 23, 2019
A-Case+ Review
Overall
-
Price - 9/10
9/10
-
Storage Capability - 10/10
10/10
-
Quality - 9/10
9/10
-
Ease of Use - 9/10
9/10
Summary
While you do have to put the case together yourself, the price makes it very affordable (and worth assembling), and the quality is great. I highly recommend an A-Case+ for anyone after a magnetic miniature case.
I’m not super convinced that these cases would be great for armies that aren’t on the than small side and mostly infantry models that are all of roughly the same height, like you’re showing here. There’s the potential for wasting massive amounts of vertical space when you have tall models that could be broken down into sub-assemblies and put into traditional foam, but that can’t be broken down with a magnetic tray. I’m thinking of something like a 40K Knight or vehicles with turrets. This is also true for armies that have tall models like the Primaris Inceptors, models that… Read more »
No argument here that this case is definitely suited more for infantry heavy. I do know that they’ve put out some larger cases too, like way larger than this. However, they were part of a recent Kickstarter and not up on the site as of yet. The new cases do fit Knights, I know that for sure, as I saw a shot of someone moving around like 6 of them plus some infantry.
I saw the KS campaign and I’ve actually contacted Olo to see if they’re continuing pledges on Backerkit. I think I could get behind a Kane.
Thanks for the write-up, sometimes user reviews of these cases are really hard to come by beyond some guy on Reddit saying “I use them, they’re good”
Olo is a good guy. He seems like the type who will do whatever he can if he’s able. Good luck with it.
I know what you mean about reviews, seen a ton like that myself.
Ya know, I didn’t consider it, but I just saw someone mention that you can reclaim lost vertical space by attaching minis to the under-side of a tray. So if you have a tall model that needs vertical space, you could still reclaim a lot of it if you trust your magnet job by utilizing the tray above it
I have seen that done. I haven’t had a need to do it but it’s a great idea.